What may seem like the easiest cooking skill to some completely escapes others, even if they know how to whip up more complicated dishes. You’d think that knowing how to cook eggs would be a basic skill everyone picks up at some point, but there are still those who are still unsure of some basic rules when cooking eggs. If this sounds like you, then we are coming to the rescue just in time! To help you perfect your egg skills, here are our quick and easy tips on the best ways to boil, poach and scramble eggs so you’ll never have to Google what to do ever again.
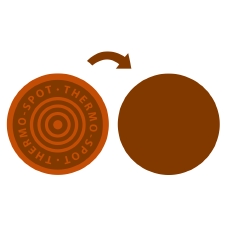
#TFALTIP: Use the T-fal ThermoSpot heat indictator on your non-stick fry pan to know when the pan is at the optimal temperature to start cooking your eggs – It will turn solid red!

How to fry an egg

A staple Canadian breakfast, the perfect fried egg can be quite elusive. We all have our own preference when it comes to how we like our fried eggs cooked – from a runny yolk to a solid one – but the method for getting yours right every time is the same, it’s the timings that change. To start with, heat a small amount of oil in a pan until it is hot but not spitting – our T-fal Thermo-Spot heat indicator will let you know when your pan is at the right temperature. Once the oil is ready, crack your egg directly into the pan, turning down the heat if it starts to spit in order to avoid burning. Place a lid on your pan to help cook the tops of your eggs without having to flip your egg over and to ensure the yolk is cooked through. You can check how cooked the egg yolk is by removing the lid and gently tapping the yolk with your spatula to see how much movement there is. When you’re happy with your egg, remove it from the pan and place it on kitchen towel to remove excess oil before putting on your plate and seasoning with salt and pepper. Now you just need the rest of your breakfast to finish the dish off.

How to boil an egg

Boiling an egg is meant to be one of the easiest cooking methods, but this doesn’t mean that it isn’t without its tricks. For starters, you’re best off using room temperature eggs, as this will stop them from cracking when they’re cooking. Secondly, you should always use a timer to make sure you aren’t left with a completely runny egg or one that is as hard as a rock. You also have slightly different techniques depending on whether you want to hard boil or soft boil your egg.

  • Hard boil: For hard boiling, you should pop your egg in a pan of cold water before bringing it up to the boil. When your water is gently bubbling away, start your timer, which should be set for between seven and ten minutes.As you probably know, the longer you boil your egg for, the harder it will it end up. However, boiling for too long can also burn your egg and let your pan boil dry, so ten minutes is a good end point.When your timer goes off, take your egg out of the water straight away and put it in a bowl of cold water for at least a minute. This will stop it from carrying on cooking so it isn’t harder than you’d like.
  • Soft boil: If you want a soft boiled egg – which is the best option for egg and soldiers – you need to have the water boiling before you put it in the pan. When your water is boiling, use a spoon to gently lower the egg into it in order to avoid it cracking.The amount of time you let your egg boil depends largely on its size and your preference. Large eggs need around four minutes to cook through but to keep the yolk runny, while medium eggs will need around three-and-a-half minutes. This will result in the white being just set, so if you want your eggs to firm up more, keep them in the water for another 30 seconds to a minute.You can also use the cold water trick with soft boiled eggs, although serving them straight away is a good way to ensure the white firms up a bit more.

How to poach an egg

There are a few ways to make poached eggs a bit easier, such as by using a dedicated egg poacher, but you can get by with just a pan of water and some vinegar. However, you get best results with fresh eggs, so this is worth bearing in mind.Start by bringing your water to a steady simmer before adding a splash of vinegar to the pan – you don’t need a lot so don’t be heavy-handed. Get your eggs ready by cracking them into individual ramekins or bowls. When it comes to adding them to the water, use a spoon to create a mini whirlpool in your pan before slowly tipping an individual egg in. This is important as it helps to keep the egg white wrapped around the yolk, which protects it from breakage and looks good. Cook your egg for three minutes before using a slatted spoon to remove it from the water. Drain excess water by placing it on kitchen towel and tidy up the edges by snipping away any wispy bits with a pair of scissors – now enjoy!

How to scramble eggs

You’ve got two different options when it comes to scrambling eggs, so the one you choose mostly depends on how much time you have and what you are mixing with your eggs.

  • In the microwave: The first way is to cook them in the microwave, which is fast and easy, although if you don’t keep an eye on your eggs, they can easily overcook. Simply break your eggs into a microwaveable container – a good rule of thumb is two or three eggs per person – add salt, pepper and a splash of milk.Use a fork or a whisk to break the yolks and scramble them up to create a light yellow mixture. Put them in the microwave for 30 seconds at a time, giving them a good mix between each time, until they reach the consistency you want.Remember that they will keep cooking for a few minutes once they are done, so if they are almost perfect, let them sit for a moment before giving them a final stir and serving them up.
  • On the stove-top: If you want super buttery and creamy scrambled eggs, doing them on the stove is the best option. This method is better if you want to swap the milk for cream or creme fraiche, which creates richer eggs.Start by preparing your eggs as above and heating your T-fal non-stick frying pan before adding a knob of butter – you can use oil but butter improves the flavour. Don’t let the butter brown or it can make your eggs stick and give a bitter flavour. When all the butter is melted, pour your scrambled egg mixture into the pan and let it sit for 20 to 30 seconds until it starts to cook. Use a wooden spoon to stir your eggs, being careful to fold them from the bottom to allow for even cooking.Repeat this sitting and stirring process until your eggs are cooked almost to how you like them, before removing them from the heat to allow them to finish cooking before serving.


As winter draws in and it starts to get colder, we all turn to certain staples to help us feel cozy on the inside. These dishes tend to be hot and heavy or rich, providing exactly the comfort we need to survive the long nights and chilly weather.

But don’t think about resting on your laurels. Even when making comfort food, it’s worth making the best comfort food ever. So, here are some ultimate versions of winter classics to take your seasonal cooking to the next level.

The ultimate jacket potato

To make a jacket potato you bung it in the microwave and top it with some grated cheese, right?! Wrong. For a start, your potato needs to see the inside of an oven some point, otherwise you just won’t get that crispy skin and that really is the best bit. And you can definitely up your game when it comes to fillings. This recipe from Supper in the Suburbs takes the humble cheese topping to a whole other level, basing it on a roux.

The ultimate soup

Soup is a wonderful winter warmer and you can easily make it from the leftover ingredients in your fridge. But if you want a really comforting steaming bowl of something quite special, then you can’t go wrong with cullen skink. This smoky, creamy Scottish dish feels nourishing as you eat it.

In this recipe from The Spruce Eats there’s no scrimping on the haddock or the butter, making for a deliciously rich soup. Pair it with freshly made crusty bread for the best winter’s day lunch you can imagine.

The ultimate winter stew

Stews are great, because you get the prep out of the way at the beginning, pop it all in your slow cooker and let it do its thing. What you’re left with is dish of rich yumminess with all your meat and vegetables included.

So, how do you up the ante with a stew? Add Guinness of course (other stout varieties are available). The alcohol from Ireland’s most famous export cooks off and you’re left with the richness it adds to the sauce. Once Upon a Chef shows you how.

The ultimate apple crumble

There’s no better excuse than the fact that it’s cold and raining or even snowing outside to add a pudding to the table at dinnertime and crumble is up there with the best.
For an even more indulgent take on the apple crumble, try this caramel version from Lucy Loves. Any family member with a sweet tooth will be totally impressed and you’ll find you’ll be making it on a regular basis throughout the winter months.

The ultimate hot chocolate

After a wintry walk when your feet got accidentally wet, or as a little treat before bed, the answer is always hot chocolate. And there are loads of ways to pimp your hot chocolate. You can add whipped cream and marshmallows for a bit of extra warmth.

But before all that you need a really good base hot chocolate recipe. After all, it just won’t do to have a watery mess at the bottom of all that tastiness. This extra thick version from An Italian in my Kitchen will do just the trick.


Ah, mom’s old pressure cooker… you can remember the racket it made and the delicious dishes that emerged as though it were yesterday! Pressure cookers have come a long way since then, and T-fal’s latest versions much easier to use and are loved all over the country to cook healthy and delicious meals in record setting times.  They are user-friendly, space-saving, and most importantly, safe to use!

02_TEPRESSURECOOKERCLIPSOMINUTEASYREDBLACK16LG75L1520004528OTHERPRODUCTPICTURES2

Delicious, healthy meals in record time!

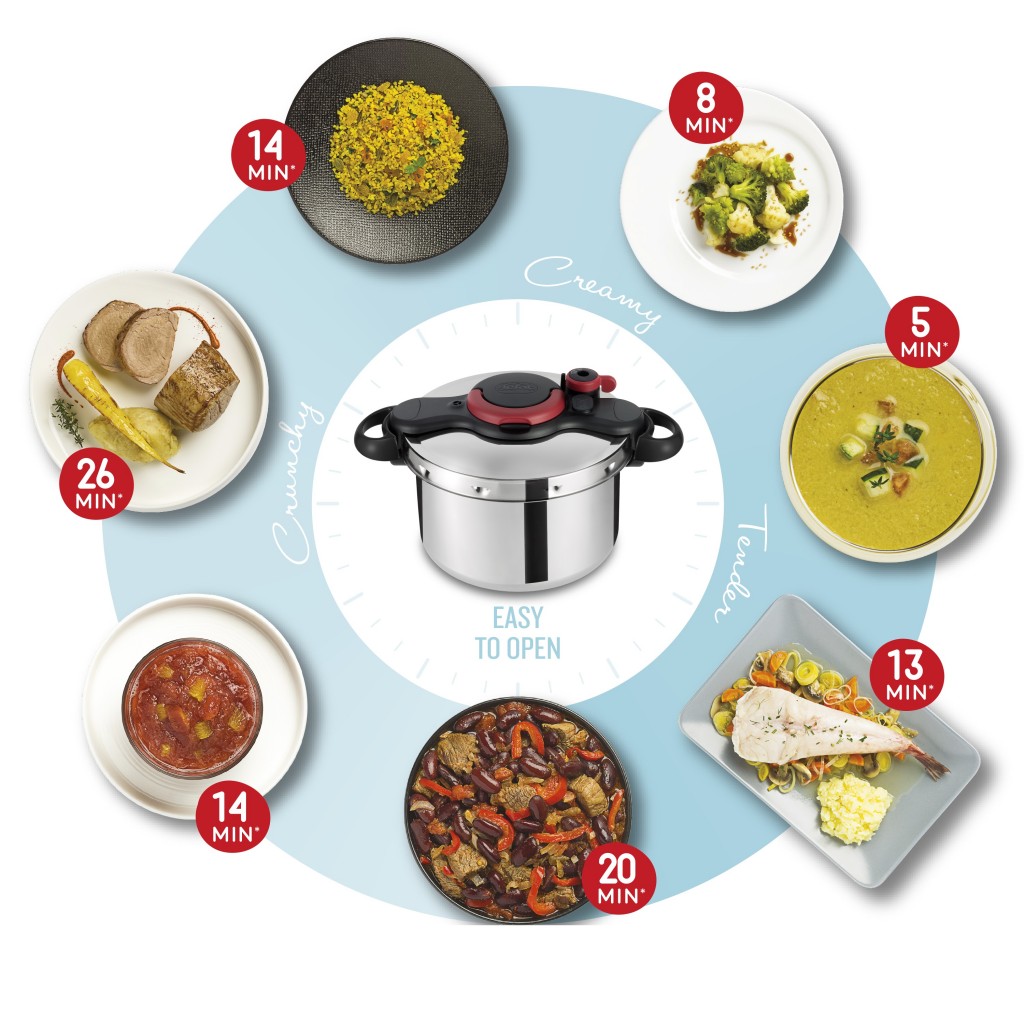
Whether you’re cooking sweet or savoury, a modern pressure cooker is all you need. You will be surprised at how quickly you can whip up delicious hearty meals in a pressure cooker. With only one hand, it is effortless to open and close the cooker. Cooking is not only easy, it is fast. Within 10 minutes, cook ingredients like vegetables, meat and fish for delicious healthy meals. Cooking made so simple, just place your ingredients in it, clip in the lid, reduce the steam if needed and you are ready to enjoy a delicious and healthy meal!

And if you still think pressure cookers are just for steaming vegetables, your new acquisition will come as something of a surprise! You can use it to simmer your meat and fish-based stews and casseroles, to make those vitamin-packed steamed dishes and – for the sweet-toothed among you – to produce fruit desserts, creamy custards, and even chocolate cake! From a thick and wholesome minestrone soup to a wickedly indulgent sticky toffee pudding, your new pressure cooker can cook it all in a jiffy. But be warned – you soon won’t be able to live without it!


 Have some fun with dad on his special day! Below are a list of activities you, dad and the whole family can enjoy! 

father-image

1. Get crafty 

Brainstorm a crafty project in your home that everyone can work on together. Pinterest can be a good place to start to get some inspiration. Some creative ideas we love are: painting a wall mural together somewhere in your home, making matching family bracelets with beads, or painting and decorating photo frames for your living room. The possibilities are endless and whatever you make will be a keep sake to remind you of the fun day you spent together.

2. Cook or bake together

Everyone grab their chef hat and put their apron on. It’s time to teach your children a passed down family recipe or create a new one together. Try to choose a recipe that is usually too complicated or time consuming to make because today you have the time, and the help from everyone to make it happen! Together as a team you and dad can tackle the recipe and get to enjoy it afterwards.

3. Board games 

For most families finding the time when everyone is free to just all relax together and play a few board games can be tough! Put out some snacks and set-up your favourite board games in the living room. You can even create a mini-marathon chart of what games you will play all day and keep score to make it a full day event.

4. Give back to the community

Take some time to tidy up and get rid of some old toys and clothes you don’t need anymore so you can donate it to your local charity. It’s a great opportunity to teach your kids the importance of giving back to the community and helping others in need.

5. Take a trip down memory lane

Pull out any old home videos or pictures you have stored up in the attic and share them with your kids. They will love hearing stories of you as a kid and seeing what both their parents looked like when they were younger.

6. Enjoy the sunshine!

Enjoy the weather by taking dad for a hike, a bike ride or a trip to the beach! Dad will love being outdoors on his special day.

However you decide to spend the day with your dad, we know that the time spent together will bring everyone closer and remind us of how special and lucky we are to have our fathers in our life.

Happy Father’s Day! 


With the complete OptiGrill range, you will finally be able to serve your guests perfectly grilled dishes with zero effort! From rare to well-cooked, the whole family will love the results because, whatever the thickness of your meat or the number of portions, OptiGrill guarantees perfect outdoor barbecues and endlessly festive dinners.

Visuel OptiGrill

The perfect indoor grill for entertaining

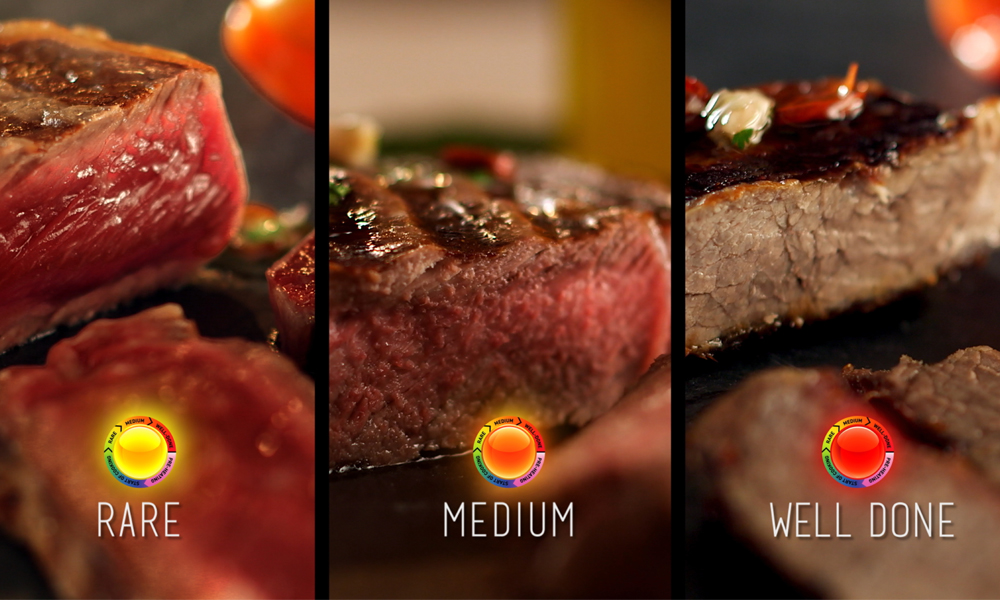
You’ve invited everyone round for dinner but each person likes their meat cooked differently! Don’t panic – with OptiGrill, you have the situation well in hand. Forgot all those long lonely hours trying to get one steak well-cooked and another rare. With six automatic programs, your grilled meat will be delicious and perfectly tailored to your guests’ tastes. But the real bonus? You can enjoy the moment! And now, thanks to the OptiGrill+ manual mode with its 4 temperature levels, you can even keep things warm or lightly grill certain foods such as fruit and vegetables. The cooking level indicator means you’ll never get it wrong again!

steak-grilled

The new programs on the OptiGrill+ allow you to cook even more types of food, such as shellfish, bacon, pork and so on, to perfection.

Thanks to these new programs, your OptiGrill+ will become your best friend for all your family meals and dinner parties. Cater for up to eight guests at a time using your OptiGrill XL! With a grilling surface 33% bigger than that of the OptiGrill+, you can cook for more people at once.  Which means less time in the kitchen, and more time to enjoy the meal with your guests. And your meat and fish grills will turn out so perfectly that they’ll all want to come back again and again!


How to read the laundry symbols on your clothes labels

Whether you’re a fashionista into the latest trends, or you have a large family with lots of laundry, we know it isn’t always easy to care for your clothes properly! Some are delicate, others are dry clean only, some can’t be ironed at all. It is those tiny clothes labels that will help you to avoid mistakes, so let’s decipher them together.

Care for your clothes by learning how to read the labels

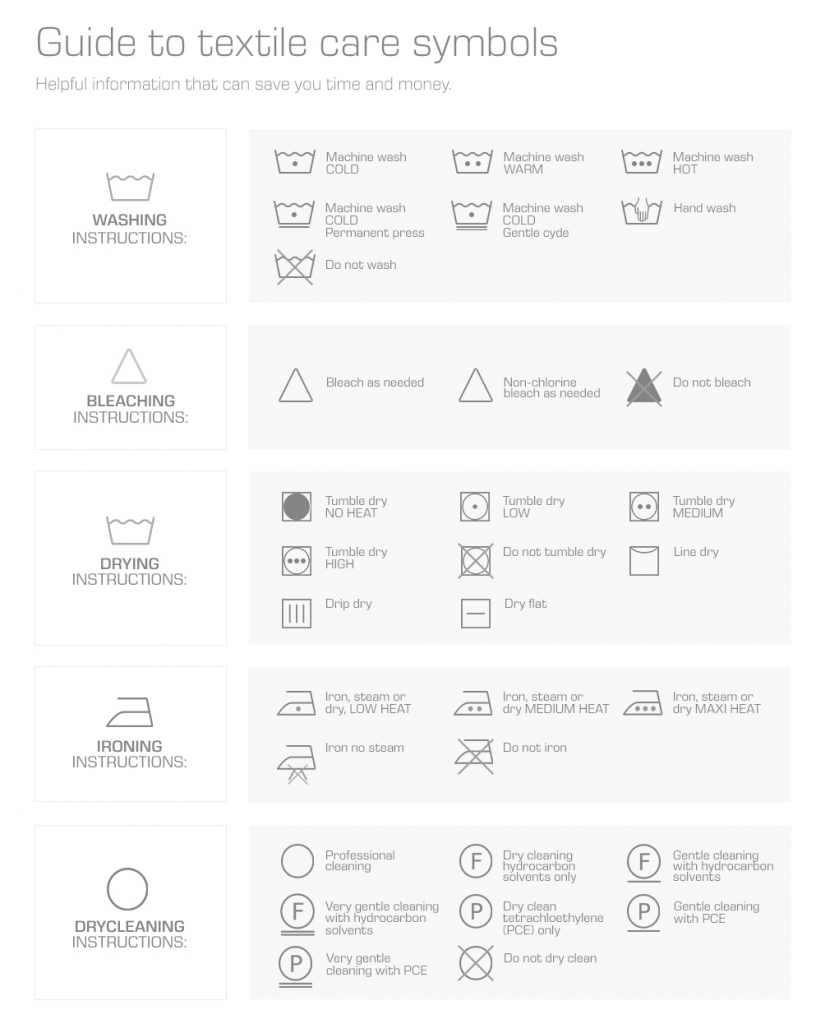
With regards to washing, every clothes label carries the symbol of a little bowl of water, showing the maximum temperature at which it can be washed in a machine. When an item of clothing needs to be hand washed, this is also indicated. Clothing manufacturers are increasingly using symbols to specify how to dry an item. These not only tell you whether or not you can dry your clothes in a dryer, but also what temperature you should use. A square with a circle inside it indicates that the item is suitable for tumble drying, while one with a cross through it means it is not.

For ironing, clothes labels have an iron symbol with one or more dots, depending on the required iron temperature. One dot is for fragile materials such as nylon, that should be ironed above a certain temperature, whilst three dots apply to cotton or linen items that can withstand a very hot iron. A little iron with a cross through it means that you mustn’t iron this item of clothing.

Finally, a triangle or crossed-out triangle tells you whether or not you can use bleach. As for dry cleaning, a circle means it’s OK, a crossed-out circle means it is not.

iron-guide


1 2 3 9